
These whimsical Christmas Grinch Hot Chocolate Bombs are just my jam for the holidays. If you identify more with the Grinch than Santa, these should be on your list of edible gifts to make your friends and family.
These vibrant green treats are not only adorable but also packed with rich, creamy hot chocolate goodness. As they melt into your warm milk, they reveal a delightful surprise of marshmallows and festive sprinkles, making each sip a magical experience.
Ingredients You Need
- High-quality white chocolate – I always use Ghirardelli white chocolate wafers. They taste really good and melt well. You NEED a high-quality chocolate.
- Hot cocoa mix – It doesn’t matter what brand you use, but you’ll obviously want one that you enjoy drinking.
- Green sprinkles – I add these sprinkles to the chocolate mix inside the ball to give more festive color to the drink.
- Mini marshmallows – Optional. Who doesn’t love marshmallows in their hot chocolate.
- Green food coloring – Liquid or gel works fine.
- Heart Sprinkles – If can be difficult to find good sprinkles, so get whatever you can find. I use these sprinkles from Amazon.
Equipment

- Silicon sphere mold – to make the chocolate spheres
- Pastry paint brush – for brushing the chocolate into the mold
- Piping bag – for decorating the bombs
- White chocolate wafers – I use Ghirardelli
- Green sugar sprinkles
- Heart sprinkles
- Cupcake liners
- Waterproof candy thermometer
Helpful Tips
- Melt Chocolate Carefully: When melting the chocolate or melting wafers, do so in short intervals (about 30 seconds) in the microwave, stirring in between. This will help prevent the chocolate from seizing or burning.
- Use a Quality Mold: A silicone mold works best for making hot chocolate bombs, as it allows for easy removal of the chocolate once it has set. Ensure the mold is clean and dry before use.
- Seal Properly: When assembling the hot chocolate bombs, make sure to seal the halves well by melting the edges slightly before pressing them together. This will help prevent any leaks and ensure they hold their shape.
- Customize Your Filling: Feel free to get creative with the fillings! You can add crushed peppermint, flavored marshmallows, or even a sprinkle of cocoa powder for an extra chocolatey kick.
- Storage: Store your finished Grinch hot chocolate bombs in an airtight container at room temperature for up to two weeks. They make great gifts, so consider packaging them in clear bags tied with festive ribbons!
Grinch Hot Chocolate Bombs
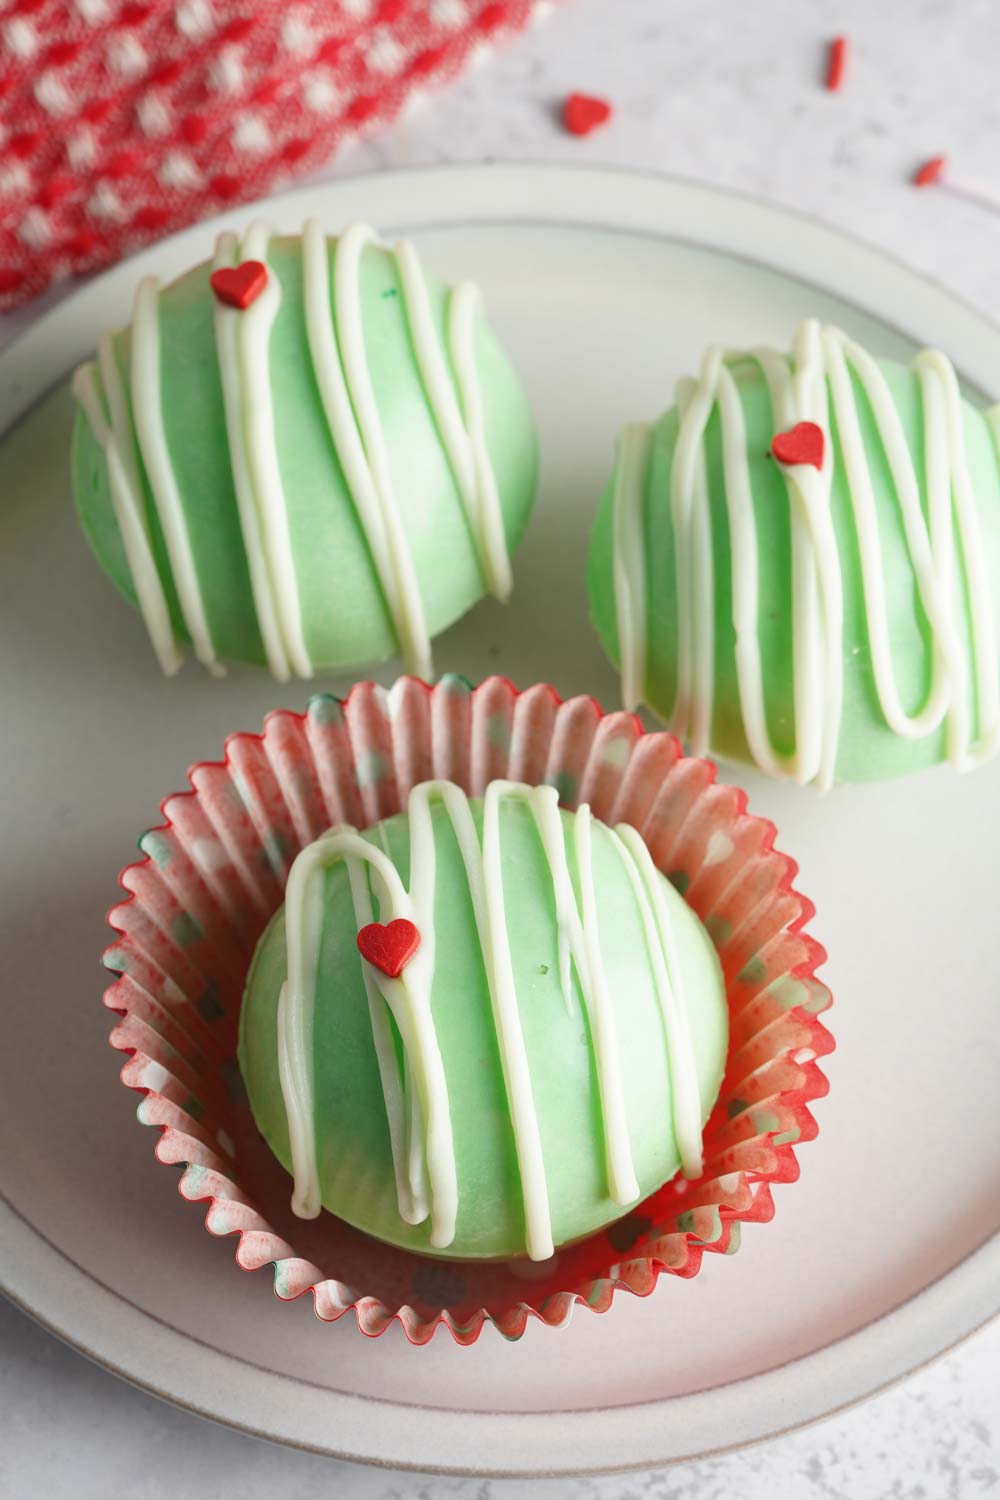
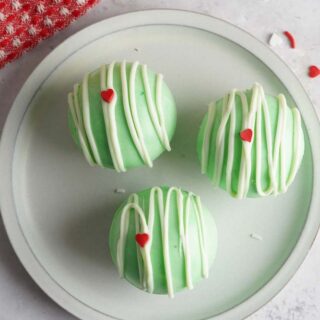
These Grinch Chocolate Bombs are a fun Christmas treat that can be made for a party or to give away to friends as gifts. Decorate them any way you like.
Ingredients
- 10 ounces 284 g Ghirardelli white chocolate chopped (divided)
- 6 tablespoons 90 g hot cocoa mix about 2 packets
- 1/2 cup 25 g mini marshmallows 1 ounce
- green food coloring
- Red candy hearts
- To serve:
- 8 ounces 227 ml whole milk
- Whipped cream
Instructions
- Set up a double boiler with a heat-safe glass bowl that fits over a small pot on the stove. The glass bowl shouldn’t touch the water.
- Heat about an inch of water in the pot over medium heat. Place the white chocolate wafers (all but about 8 wafers) into a heat-safe glass bowl and place it on top of the pot.
- Stir the chocolate with a silicone spatula as the chocolate melts. Do not allow the chocolate to get too hot or it will scorch.
- Remove from heat as soon as chocolate is half melted.
- Continue stirring until all of the chocolate melts. Drop in a couple drops of green food coloring until it reaches the right color of green.
- Once the chocolate has cooled to 82°F, place the bowl back on the double boiler until smooth enough to paint into the mold. Keep chocolate between 82°F and 90°F while working, if possible.
- Use the back of a spoon to coat the inside of each sphere. Place the mold in the refrigerator for 5 minutes.
- Remove the chocolate shells from the mold.
- Place half of the molds, cup facing up, on a flat surface. Fill with 1 tablespoon hot cocoa and 1 tablespoon mini marshmallows.
- Heat a small pan over low heat on the stove then turn it off. Quickly melt the rim of the unfilled mold on the pan then stick it to the filled mold to adhere them together. Working quickly, do this for all spheres.
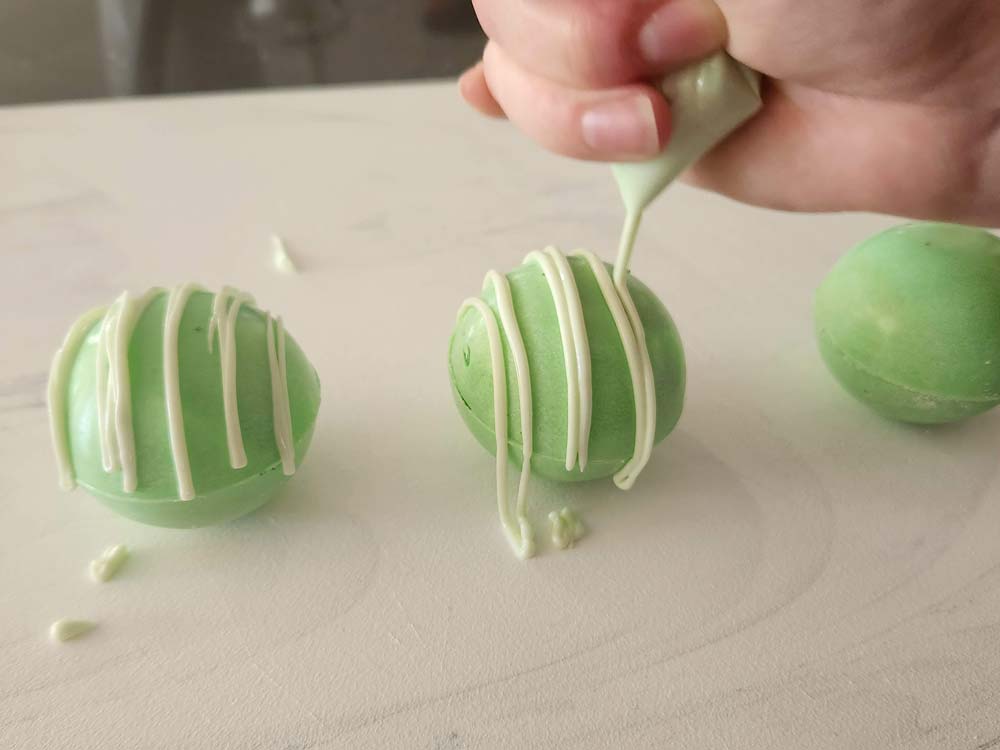
- For the drizzle on top, heat the remaining 8 chocolate wafers in a microwave safe bowl at 15 second increments in the microwave, stirring in between. When mostly melted, remove and stir until completely melted. Drop in one small drop of green food coloring to make a lighter color than the spheres. Transfer the chocolate to a small plastic baggie. Cut a very small corner off the bag. drizzle melted chocolate over the tops of your spheres and add a candy heart.
To serve:
- Steam or microwave 8 ounces of milk. Place one hot chocolate bomb in a mug and pour the steamed milk over the top to melt the chocolate. Stir and enjoy.
Notes
- This recipe makes 6 chocolate bombs.
- When tempering the chocolate, you don’t want to let the it exceed 120°F for dark chocolate or 105°F for milk or white chocolate.
- Make sure to get the chocolate all the way to the edge of the mold. This will make it easier to match up the two sides to seal them later.
- Don’t skimp on the chocolate when you are filling the molds. Don’t make the chocolate layer super thin. The more chocolate you put on, the more that will melt into your drink (yay!) and the studier the bombs will be.
- Don’t worry if your edges come out of the mold looking less than perfect. When you melt and seal them you won’t be able to tell.
- When you are ready to seal the two halves, heat a small pan over low heat on the stove for about 15-30 seconds, then turn it off. It doesn’t take much heat to melt the edges. This is a great way to clean up jagged edges as well.
Tried this recipe?Let us know how it was!

Laura is the founder and editor of the travel blogs Savored Sips and Savored Journeys. She is dedicated to sharing the best information about drinks found around the world.