
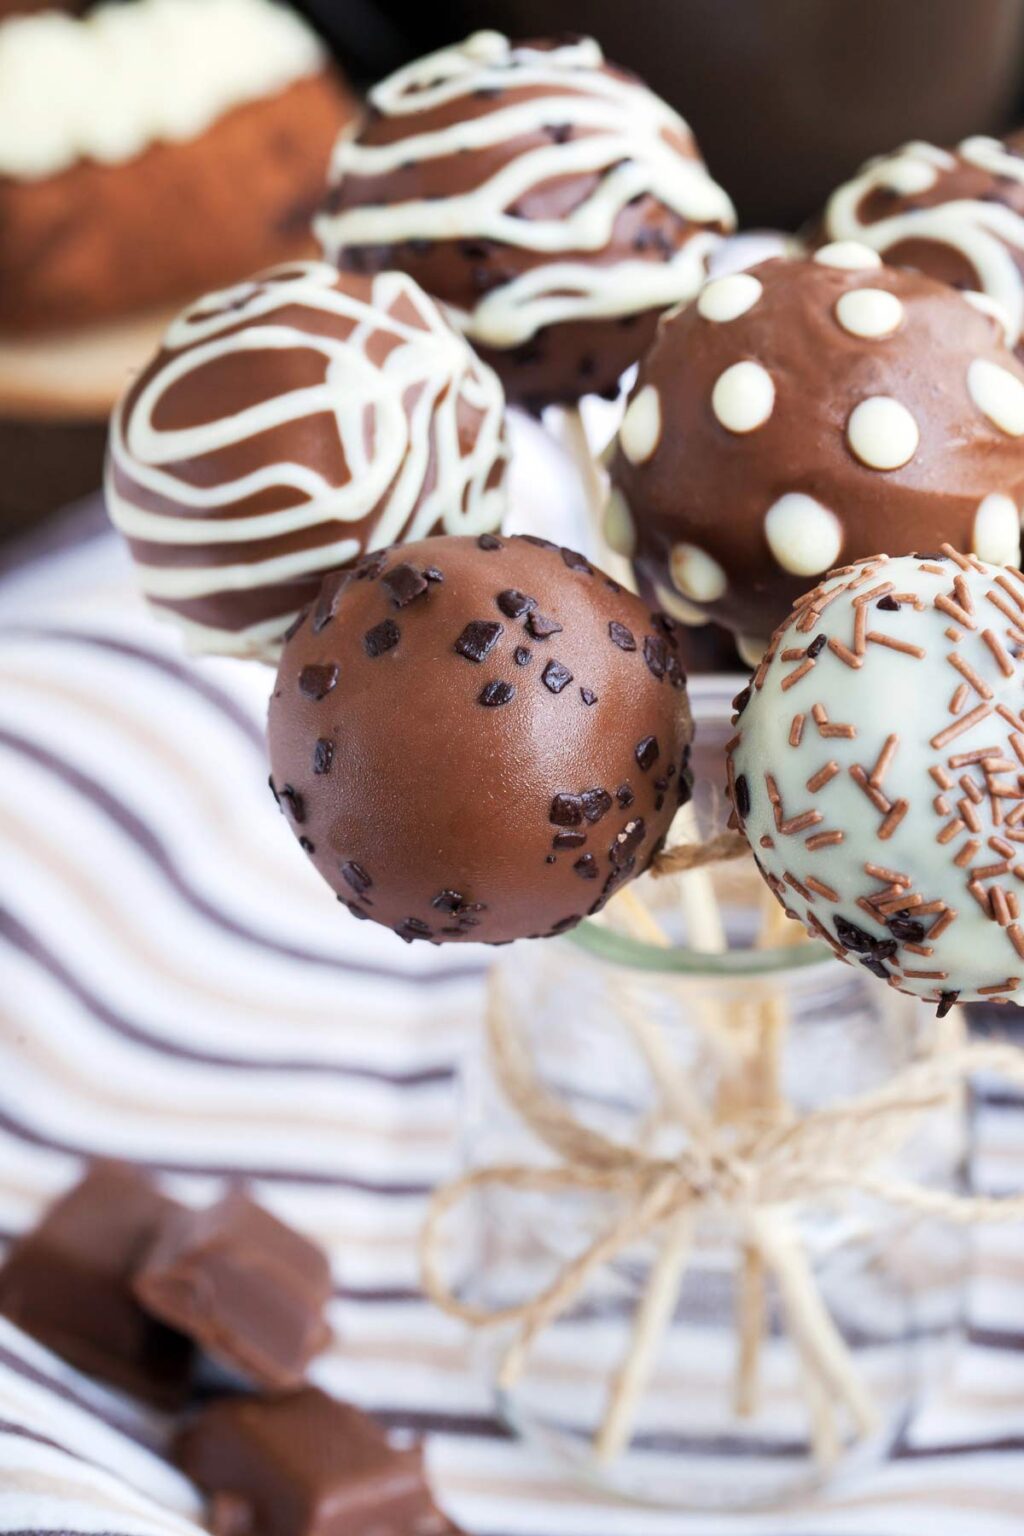
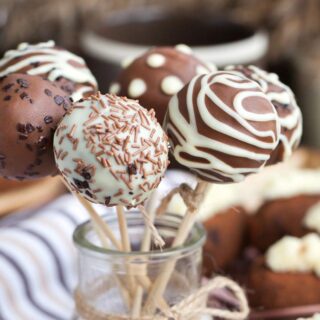
Christmas Cake Pops are the ultimate festive treat—adorable, bite-sized, and full of holiday cheer! These fun desserts are perfect for parties, gifts, or even as a family activity to get everyone into the holiday spirit. With their moist cake centers and beautifully decorated coatings, they’re as delightful to look at as they are to eat.
What You’ll Need
Thinking of giving this as a holiday gift? Check out these fun containers and decorations to make it extra special!
- Cake Pop Set – This set contains treat sticks, little parcel bags, and twist ties to seal them.
- Sprinkles – Different sprinkle combinations make these cake pops fun. Check out this 6 pack holiday mix and this Sprinklefetti Christmas mix.
- Paper Treat Bags
- Foil Treat Containers
Helpful Tips
- Use chilled cake balls: After shaping, refrigerate the cake balls for at least 30 minutes to help them hold their shape when dipping.
- Melt candy coating carefully: Microwave in short bursts and stir frequently to avoid scorching. Smooth, melted coating makes for a flawless finish.
- Decorate quickly: Add sprinkles, edible glitter, or other decorations while the coating is still wet so everything sticks securely.
Like this post? We’d love for you to save it to your Pinterest board to share with others! FOLLOW US on Pinterest, Instagram, Facebook for more great recipes! If you made it, post a pic on Instagram and hashtag it #savoredsips
Christmas Cake Pops
Ingredients
For the Cake Pops
- 1 box chocolate cake mix plus ingredients required on the box
- 1 cup chocolate frosting store-bought or homemade
For Dipping
- 12 ounces chocolate candy melts dark, milk, or white chocolate
- Few drops of vegetable oil for thinning, if desired
For Decoration
- Sprinkles your choice of colors and shapes
- Lollipop sticks or cake pop sticks
Instructions
- Preheat your oven according to the instructions on the cake mix box. Prepare a 9×13-inch cake pan and bake the chocolate cake as directed. Allow it to cool completely in the pan.
- Once the cake is completely cool, remove it from the pan and crumble it into a large mixing bowl. You want fine crumbs, so make sure there are no large pieces.
- Add the chocolate frosting to the crumbled cake. Use your hands or a spatula to mix until the cake and frosting are fully combined and the mixture holds together when squeezed.
- Scoop out small portions of the mixture (about 1 tablespoon each) and roll them into balls. Place the shaped balls on a baking sheet lined with parchment paper. Once all the mixture is shaped, refrigerate the cake pops for about 30 minutes to firm up.
- While the cake pops are chilling, melt the chocolate candy melts according to the package instructions. If desired, stir in a tablespoon of vegetable oil to help thin the chocolate for easier dipping.
- Remove the chilled cake pops from the refrigerator. Dip the end of each lollipop stick into the melted chocolate and then insert it into the center of each cake ball, about halfway through. This helps secure the stick in place.
- Dip each cake pop into the melted chocolate, ensuring it is fully coated. Gently tap the stick against the side of the bowl to remove any excess chocolate.
- While the chocolate is still wet, immediately sprinkle your desired toppings over the cake pops. You can also gently roll the cake pops in a plate of sprinkles for even coverage.
- Place the decorated cake pops upright in a foam block, a cake pop stand, or a container filled with rice to allow the chocolate to set completely. If desired, you can refrigerate them for a few minutes to speed up the process.
Notes
- They can be stored in an airtight container at room temperature or in the refrigerator for up to a week.
- Get as creative as you want with your decoration. You can change these in so many ways with different colored chocolates and sprinkles.

When not mixing up delicious cocktails to enjoy on the patio with friends, Angela is busy writing about food and drinks for three popular food websites, and exchanging creative ideas on social media.